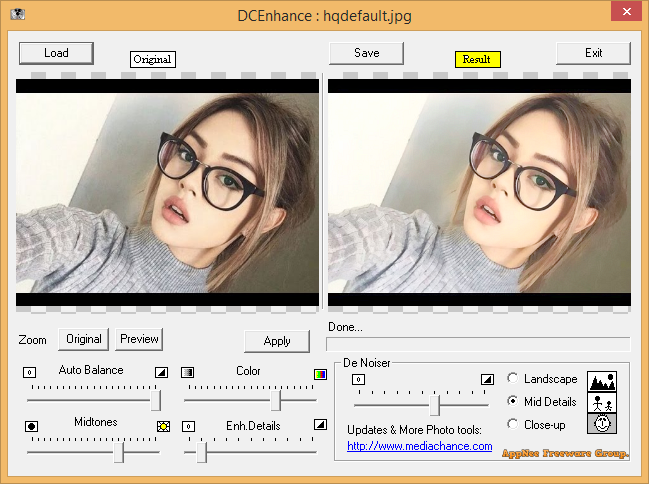
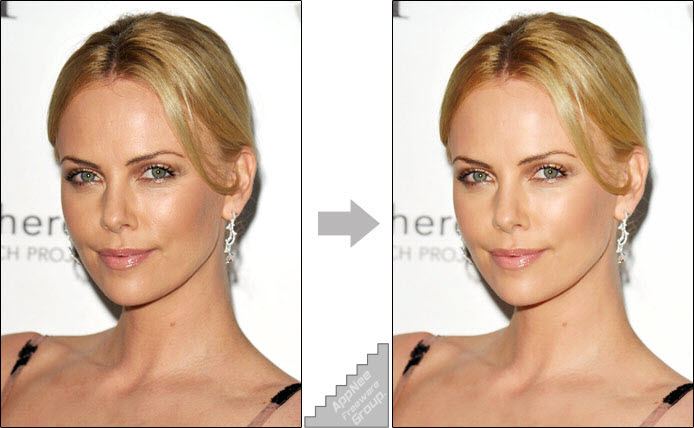
Digital Camera Enhance (DCEnhance/DCEnhancer for short, AKA: Free Digital Camera Enhancer) is a free and tiny image processing automation program developed by MediaChance (written by R. Voska) from Canada. It's mainly used to manually or automatically bring blurry photos taken with a digital camera into focus with one click! Therefore, it is very suitable for processing photos taken when the light is not good enough (indoor, with shadow, etc.), and especially good at making cool portraits and close-ups.
As a free and foolproof image sharpening processing software, the latest MediaChance image processing algorithms of noise reducing, skin smoothing and automatic balance control used by Digital Camera Enhance make it different from other similar tools. And, in addition to being useful for photos taken with a digital camera, it's also pretty suitable for a variety of common image formats, including BMP, JPG, PCX, PNG, TGA, TIF, WMF, and PAX.
The use of Digital Camera Enhance is very simple: you only need to load a digital photo to be processed in program, then the program handles everything automatically for you. Of course, if you are not satisfied with the result, you can also manually adjust some details (including focus position - depth of field, color balance, shading intensity, detail enhancement, noise removal, sensitivity, zoom display, etc.), and preview the final effect in real time.
Prompts
- This software is intended for advanced users. Most of the sliders work in the default position. (As on the screen capture). You should gently change one of the sliders just little and then see the effects. Once you find your optimal settings, it should work on most of your images from the same camera. And you will always find images where it doesn't work.
Tips
- Don't try to make magic with image which is already fine balanced. No software could add pixels. So if you don't see much details, it is the time to move to the 2.1 Mega Pixel...
- Don't boost the Color too much. By enhancing the colors you also enhance the pixel difference.
- Most of the cameras underexpose a little. That means you have to move the Midtones slide somewhere to the 3/4 (closer to the right) However some of your images could be overexposed (already too bright). Move the slider close to the left, make it darker.
- When you are using the Noise reducing select the type of image - Landscape, Mid Details and Close-up. If you for example use Close-up for image of landscape, it will smooth all the details of grass and trees and the image wouldn't look too natural.
- Do not take your shots from inside car. Just stop and get out. It is worth it.
- Don't replace the original images unless you have seen the image in your favorite viewer and you are fine with the result.
Download URLs
| License | Version | Download | Size |
| Freeware | Latest |  |
n/a |